Creating a New Pool
Within the Pools option select the pool type you would like to create from the drop down list and then click on Create Pool:

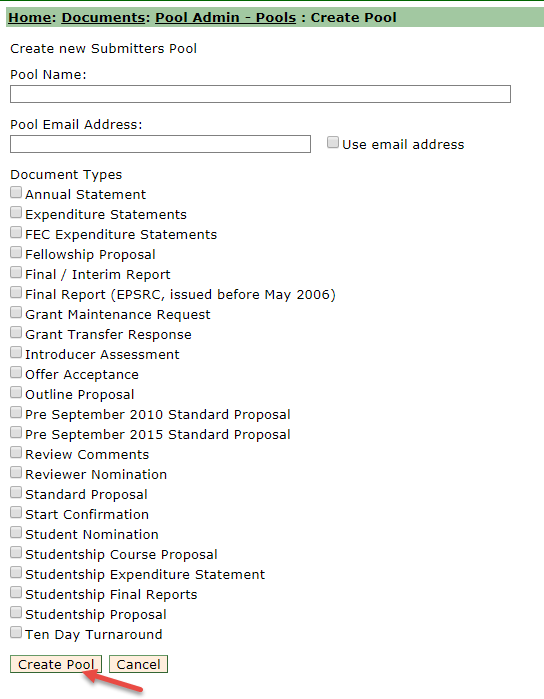
You can name the pool and select an email address (this is optional) to be used to notify when documents are submitted to this pool (this is not expected to be the email address of an individual, it should be a generic address). You can use the tick boxes to indicate which document types you would like to go into this pool and select Create Pool:

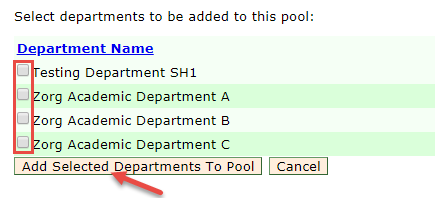
Select Show/Hide Pool Departments and then Add Department, you will be presented with a list of all the departments at your organisation, tick next to the one(s) you wish to select and then click ‘Add Selected Departments To Pool’ to allocate them to the new pool. A department can be in more than one pool as long as the specified document type is different:

Select Show/Hide Pool Members and then Add Member, you will be presented with a list of all the individuals at your organisation, tick next to the one(s) you wish to select and then select and click ‘Add Selected Users To Pool to allocate them to the new pool:

Select Show/Hide Pool Documents to see any documents that are currently in the pool (there will not be any at this stage as the pool is not yet active).
Select Show/Hide Pool History to see an audit trail of when the pool was created and when and by whom departments and individuals were added.
To make the pool active, select the ‘Activate’ option:

Once the pool is active the option will then change to ‘De-Activate’
Delete pool will only be possible if all departments have been removed from the pool first, if they have not been removed you will receive an error message:
