| NOTE: |
You will only see the  button if you are able to access Je-S using the RO Master ID. button if you are able to access Je-S using the RO Master ID. |
The RO Master ID can perform Pool Administration tasks to control the approval and submission of documents. It can:
- control the way in which departments are pooled
- set up people within department pools
- manage the assignment of documents to specific users
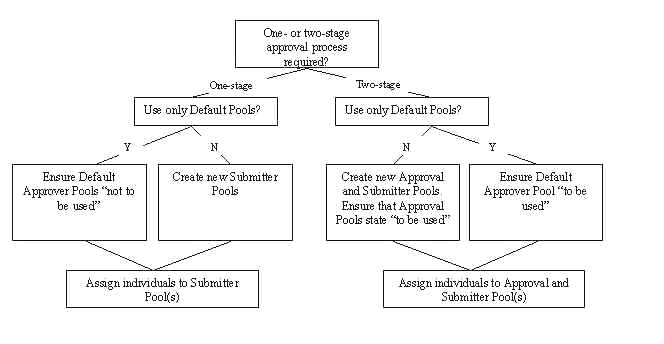
Default pools are provided on the Je-S system:
- department pools provided for proposal and final report submission:
- Default Approver pool
- Default Submitter pool
- department pools provided for expenditure statement submission:
- Finance approver pool
- Finance submitter Pool
- department grouping for Researcher/Student details (DTA) submission:
- Default DTA Submitter pool
- Researcher/Student details grouping to control user access to researcher/student details by category:
The RO Master ID can use these default pools and/or create and administer new pools.
The steps involved in organising Approver and Submitter Pools are as follows:
Add a new pool
- Click on
The Pool Admin screen will be displayed:
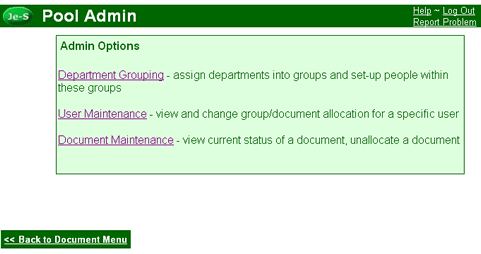
- Click on the Department Grouping link.
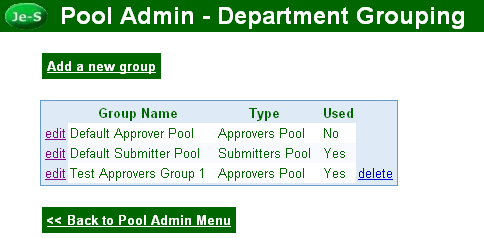
The Pool Admin - Department Grouping screen will be displayed:
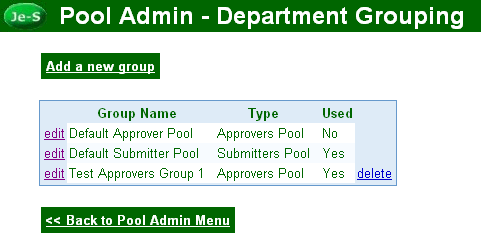
- Click on

The Pool Admin - Add New Group screen will be displayed:
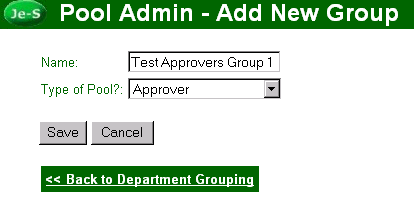
- Enter a name for the new Pool.
- Select the type of pool you want to create, i.e. Approver or Submitter.
- Click on

A list of pools will appear. This should include the pool you have just created:
Add a department to a new pool
- From the Pool Admin - Department Grouping screen, click on the edit link to the left of the relevant Pool name.
- Click on

The Pool Admin - Edit Group - Add Department(s) screen will be displayed:
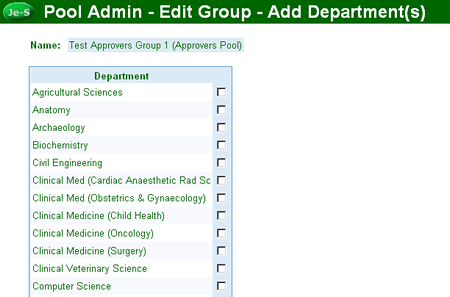
- Click to insert a tick in the check-box to the right of the relevant department(s), then click on
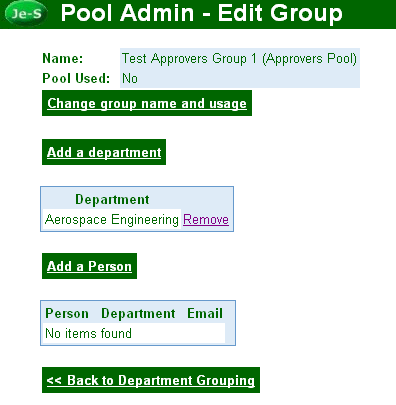
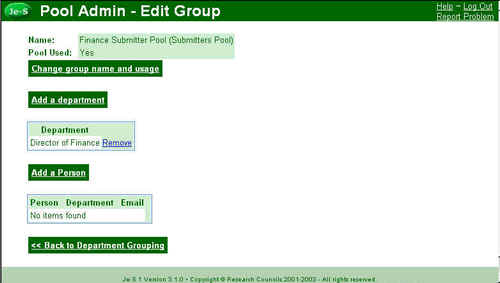
A list of all departments in the Pool, if any, is displayed on the Pool Admin - Edit Group screen. Each department you subsequently add will appear in this list. These departments will be removed from the corresponding default Pool.
Add a person to the new pool
- From the Pool Admin - Department Grouping screen, click on the edit link to the left of the relevant group name.
- Click on

The Pool Admin - Edit Group - Add Person(s) screen will be displayed:

- Click to insert a tick in the checkbox to the right of the relevant person, then click on
A list of all persons in the group, if any, is displayed on the Pool Admin - Edit Group screen. Each person you subsequently add will appear in this list.
Stop using an existing Pool
Click on the edit link to the left of the relevant group name, then click on Change group name and usage, untick the Use this pool? check-box and press (Approver Pools only)
or
Click on the delete link to the right of the relevant group (Approver and Submitter Pools).